Configuration by Web Page
This page presents capabilities of configuration ethernet converters. At the beginning, make sure that converter is connected to power supply and to the LAN using the patch cord. User interface is mostly similar for every converters but some subpages might be diffrent for several models depends on amount of interfaces. In order to avoid some issues, click on a Help button in the top right corner on every page.
Login
To access the web page open the browser, type IP address of the converter (default is 192.168.100.100). Then log in using your personal credentials unless it is a first configuration or converter had factory reset, then use default login details.
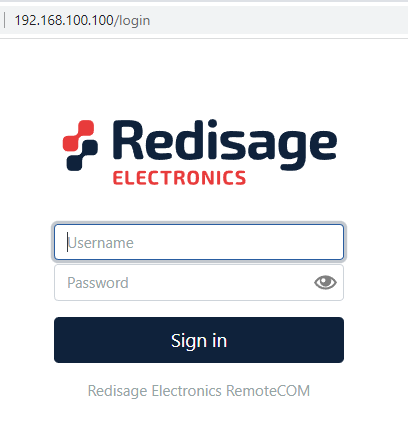
Login panel on the web page
Configuration is available only if devices are connected to the same Local Area Network as the computer you are using.
Status page
After successfull login, you have insight to important information such as port status, service and port which are in use and more details about connection.
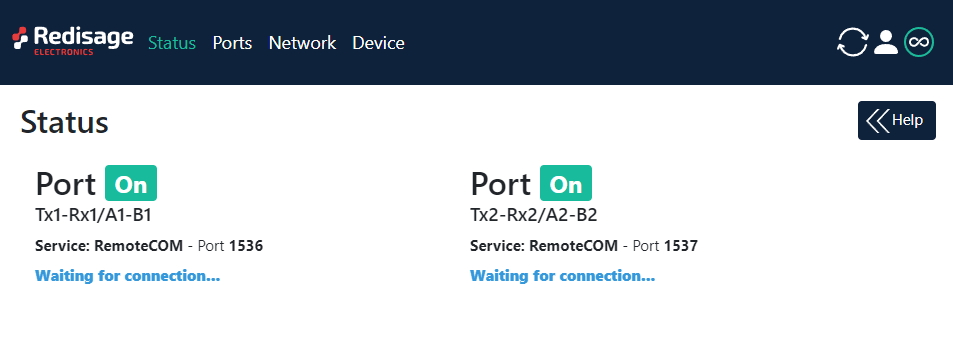
Status page
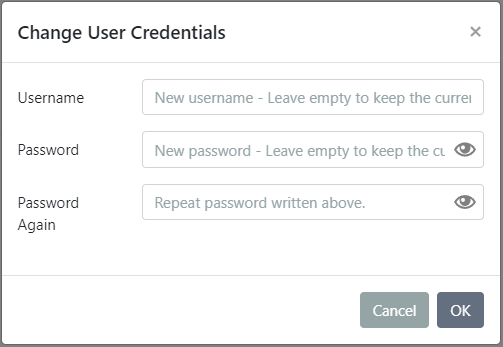
Changing username or password
To change your username or password you have to click on user icon and then Edit User.
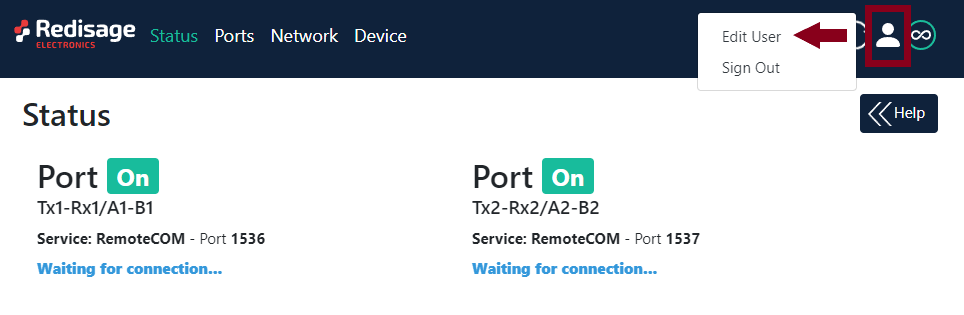
Edit User
In the next step you will be able to change user credentials up to your preferences.
If you forgot your login details, all you can do is factory reset via USB/UART converter and serial console.
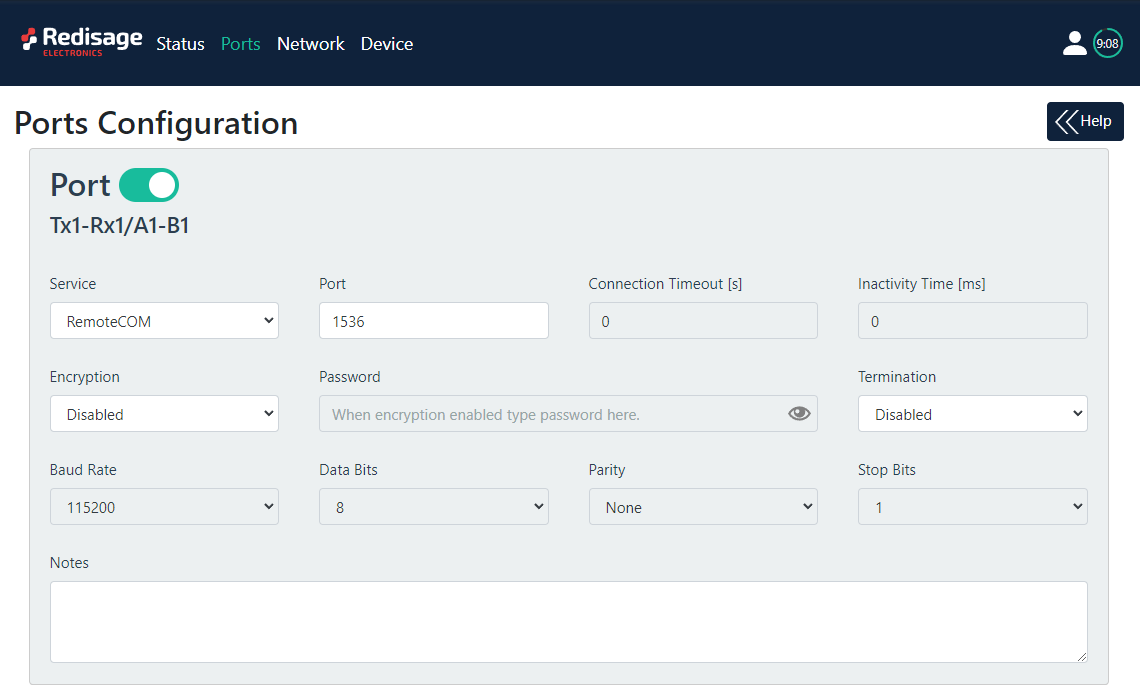
Ports configuration
This page allows to configure ports. There is located toggle switch next to Port label by which you may turn ON/OFF every particular ports.
Ports Configuration
Item | Description | |
|---|---|---|
Service | RemoteCOM | Determines how the port 'talks' over the network. Choosing RemoteCOM lets to attach the port to a computer running the Redisage Electronics VSP Client as if it was physically present in the computer. |
TCP Socket | Choosing TCP/UDP Socket exposes this port as a regular network socket - connect to this socket with own software and write/read data to send/receive data over the serial port, without any additional software or serial port handling. | |
UDP Socket | ||
Port | The service number - the device has an 'IP Address' by which it is identified, and a couple of services running on it. It's required to tell the device which service should be in use, by entering this device's IP address and the port number in the RemoteCOM client, or your software. | |
Connection Timeout [s] | The time specifying how often (every how many seconds) the "keep alive" packet is to be sent to check if the client is still connected. Value 0 means that the connection is kept permanently without any timeout. | |
Inactivity Time [ms] | The maximum allowed time in milliseconds when there is no data transfer. When connection is inactive for the time longer or equal to the entered value, then it will be closed. Value 0 means there is no measure of the inactivity time at all. | |
Termination | Enables/disables termination on the RS line. | |
Encryption | Determines how the data is protected 'in flight' over a network. It is available only with the RemoteCOM service. Once enabled, you'll have to set the Password. | |
Password | Protects the communication between the device and various clients - keep it secret! Same settings have to appear in clients - without the correct passwords, a client will not connect at all. | |
Baud rate | Determines the port's transmission speed over the data channel. | |
Data Bits | Determines the number of data bits in the port's message frame. | |
Parity | Enables/disables parity check in the port's message frame. | |
Stop Bits | Determine the number of stop bits in the port's message frame. | |
Notes | These notes are for information only - feel free to write down anything related to this port (device it connects to, etc.). They're also shown in the Configurator during the device discovery - in other words, they're public. | |
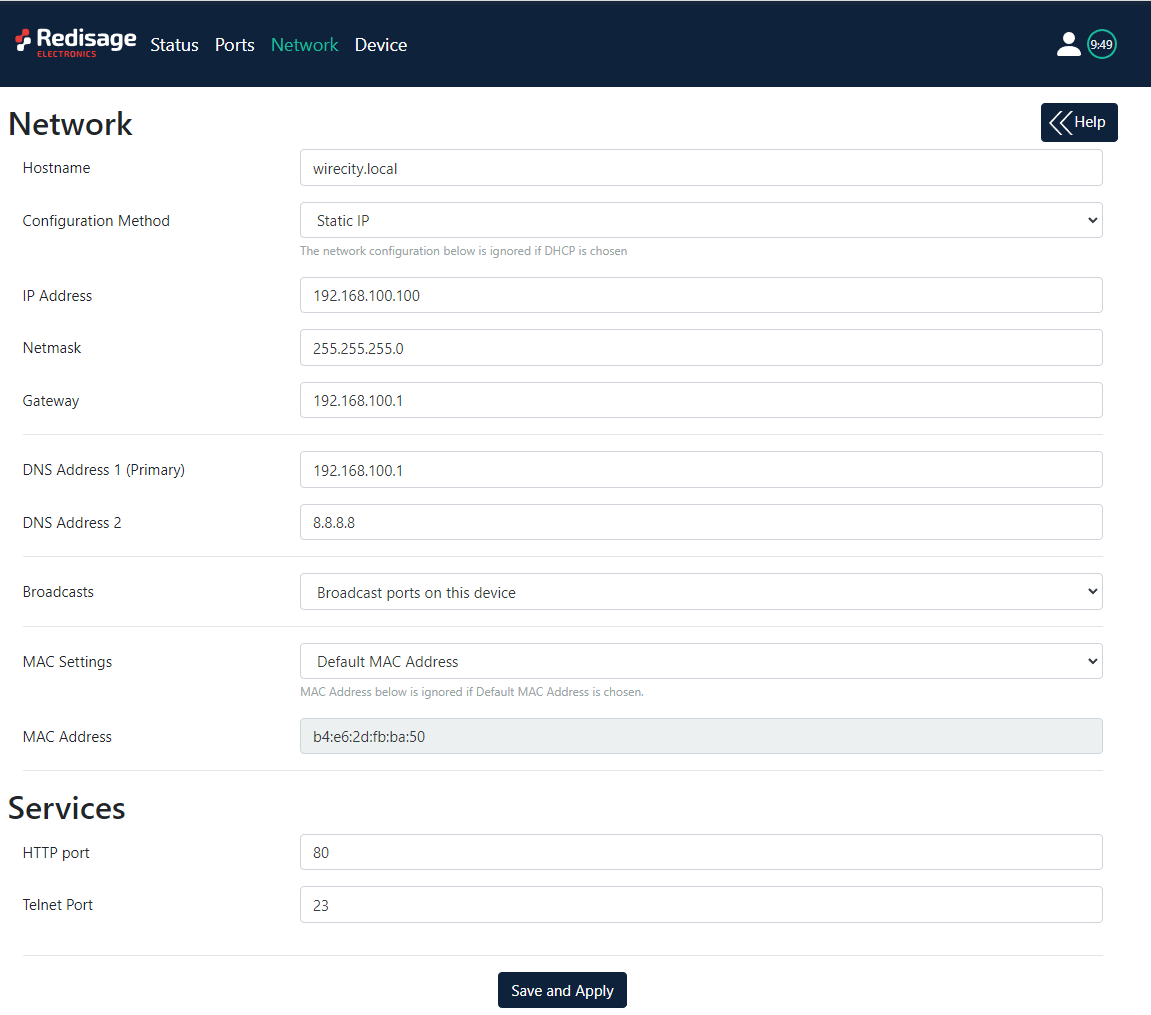
Network settings
In this section, network settings can be changed according to target LAN parameters.
Network settings
IP address of the converter is static by default
It is possible to obtain dynamic IP address. Just switch configuration method from Static IP to DHCP (automatic). This process may cause some issues with identifying converters in LAN unless you have access to the device which is responsible for allocating IP addresses.
Keep in mind that in case of changed IP address you need to type new IP in the address bar and log in again.
Item | Description |
|---|---|
Hostname | Label that is assigned to the Device. |
Configuration Method | Enables/disables the DHCP server. If the DHCP server is disabled, the IP Address of the Device has to be set manually. |
IP Address | IP Address of the Device. |
Netmask | Netmask associated with the IP Address. |
Gateway | Gateway address currently used by the Device. |
DNS Address | Domain Name System used by the Device. |
Broadcast | Notifying RemoteCOM clients in the same network about this device's existence. With this enabled, the Configurator will automatically set most of the settings correctly for you. All you need to do is to pick the correct port. |
MAC Settings | Allows setting the default MAC address or typing it manually. |
MAC Address | Allows changing the physical address of the Device. |
HTTP port | Determines the port of the control panel. |
Telnet port | Allows connection with the device via Telnet. |
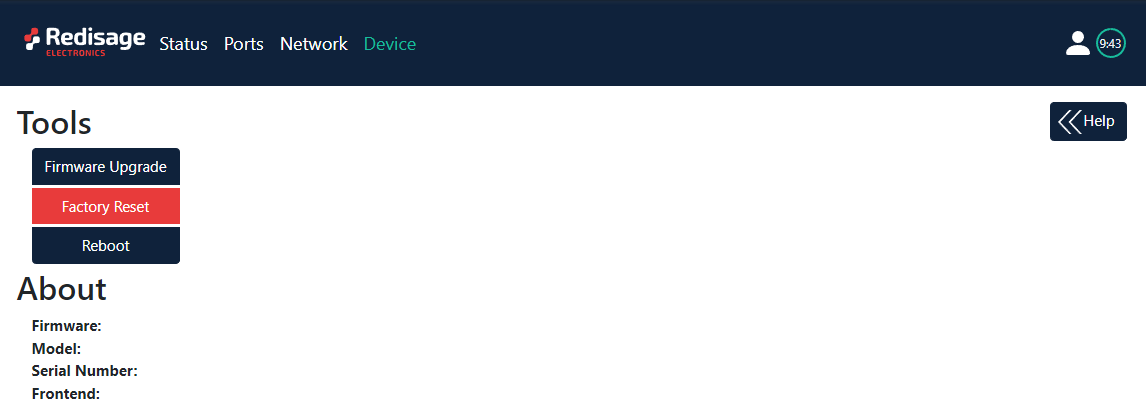
Device page
On the device page there are information about device and tools to factory reset, firmware upgrade and reboot device.
Device page
Item | Description |
|---|---|
Firmware Upgrade | Upgrades firmware |
Factory Reset | Restores default ports settings and default network configuration |
Reboot | Reboots the Device |
About | Contains basic information about the Device |
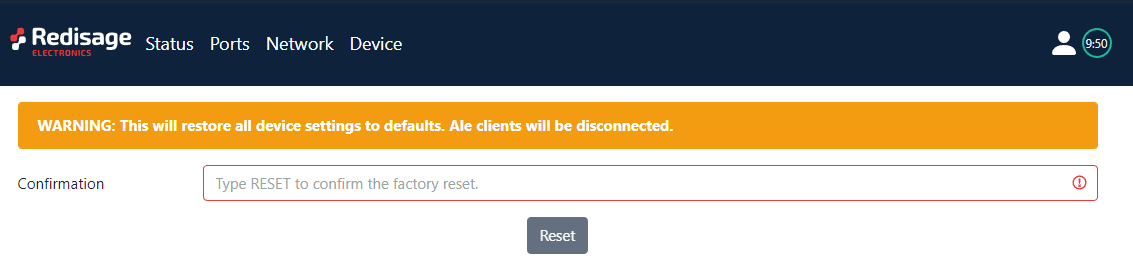
Factory reset
To restore default settings, press the red button. After that, you will be asked for type “RESET”. Then, it takes few seconds for reloading webpage and restarting device.